Here is an excerpt from Chapter 1, Getting Started with LaTeX.
Working with LaTeX online using Overleaf
Installing LaTeX on your computer is recommended, but it can take up about 8 GB on your hard drive and two hours to install it.
How about simply using LaTeX in your internet browser? Here comes Overleaf. It’s a pure online LaTeX service that mathematicians enthusiastic about TeX started in 2011. You can access it through this link: www.overleaf.com.
In this section about Overleaf, we will do the following:
- Check the Overleaf requirements
- Look at the benefits of Overleaf
- Evaluate possible caveats
- Use the Overleaf editor
- Try out Writefull
Let’s go online now.
What Overleaf requires and delivers
To use Overleaf, you need any internet browser, such as Firefox, Chrome, Opera, or Edge. You don’t need any other local software such as a LaTeX compiler, editor, or PDF viewer.
It is free for basic usage, and that covers a lot. It provides a complete TeX Live with unlimited projects and a feature-rich editor, real-time-sync collaboration with another user, and hundreds of templates to start with. You can easily write your thesis or book with Overleaf with free usage.
An advanced personal or professional subscription costs money and provides additional features, such as the following:
- Unlimited collaborators per project
- Document history (going back and forth between document versions)
- Advanced bibliography management (with Mendeley)
- Dropbox sync integration
- GitHub integration
- Priority personal support
The advanced features go beyond regular LaTeX. You can check if you are eligible; many universities and institutions partner with Overleaf to provide their members
the full service.
Benefits of Overleaf
Let’s look at what you can gain when using Overleaf, compared to using classic editors locally on your computer. With Overleaf, you can do the following:
- Use it on any device, such as a PC, laptop, tablet, or smartphone.
- Use it on a locked-in work computer where you cannot install anything yourself.
- Access your own files on any device (be it a private or work or library computer) once you log in with your password.
- If you invite somebody to work with you, both of you can instantly edit and see each other’s changes, making collaboration easy.
- Have an automatic real-time view of the PDF result while you type.
- Access a version history for LaTeX projects to track changes.
- Annotate LaTeX source code with comments and answers to them.
- Work with a new LaTeX software without doing an upgrade.
However, there are some challenges to Overleaf. Let’s think about that now.
Caveats of working online
To be clear, there can be some caveats:
- You always need the internet available.
- As your documents are stored online, you have to rely on data security and privacy by Overleaf. See www.overleaf.com/legal.
- You depend on Overleaf’s features; their TeX version could be a bit behind the official TeX Live until they update theirs.
- The speed depends on their servers and your network connection, not just on your own computer’s performance.
Let’s take a closer look at how Overleaf works.
Creating our first document online
We want to create our own space on Overleaf in two steps. Then we will start our first LaTeX project:
- Register for the service. Either click on Register on the Overleaf home page or go to www.overleaf.com/register. Enter your email address and choose a password.
- Log in to Overleaf. Either click on Login on the front page or go to www.overleaf.com/login:
Why do we need to register?
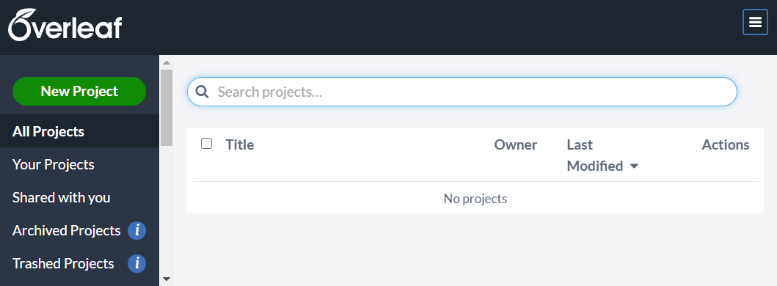
To be reachable via an email address is basically to comply with data protection law. If you forget your password, you can ask Overleaf to send a password reset link to your email address. In general, by using your email address, you can prove your identity and ownership of your data if you ever need to. - Click the New Project button. A drop-down list will appear, where you can choose to have a blank project or one based on a template, such as a book, presentation, CV, or thesis template. For now, we just choose Blank Project.
- Overleaf asks you for a name; choose one. That’s it! This is what you have now:
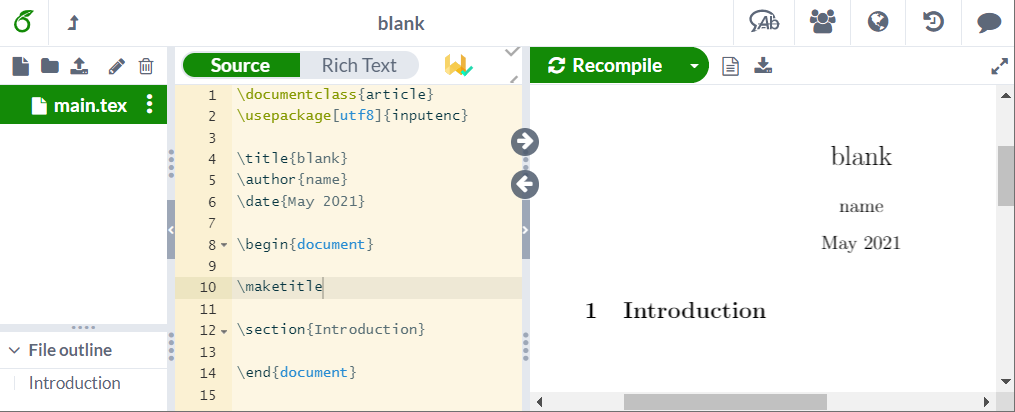
It’s not entirely blank as it contains a small code frame, so you got a quick start, and you can begin filling in your text.
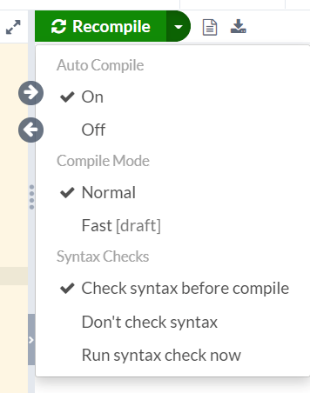
Whenever you click the Recompile button or press Ctrl + Enter, the preview on the right side will be refreshed. You can enable automatic typesetting if you open the Recompile menu and choose Auto Compile in the drop-down menu, which is switched on in the following figure. The document refreshes frequently and automatically while you are typing:
Since Overleaf is so different from classic LaTeX editors, let’s have a closer look at it.
Exploring Overleaf
To quickly see a more complex document in action and to understand what you can expect from Overleaf, let’s open the Masters/Doctoral Thesis template from www.latextemplates.com/template/masters-doctoral-thesis. Once you are there, simply click the Open in Overleaf button. Then Overleaf creates a project for you:
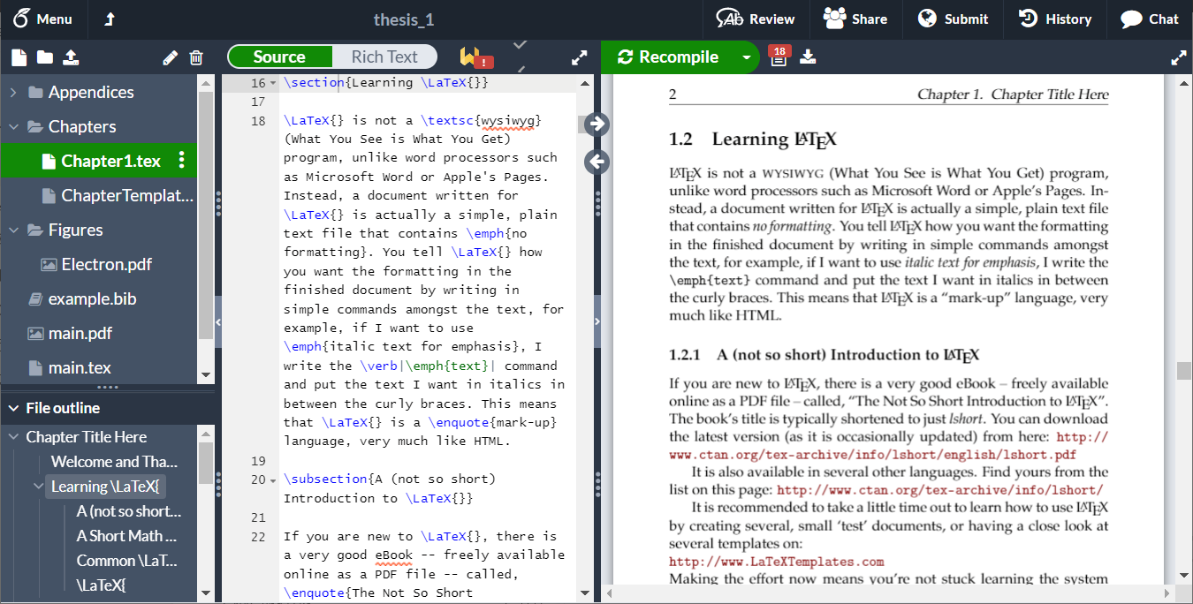
In the figure above, on the very left, you can see your folder structure and files. Next to it, there is the LaTeX source code. On the right, you can see the output in a PDF preview.
In its most basic form, you write your code on the left, click the Recompile button, and see the result on the right, as we previously did in our example.While you are working, Overleaf keeps track of the history. You can label versions to check them later. Clicking on the History button at the top shows you the versions:
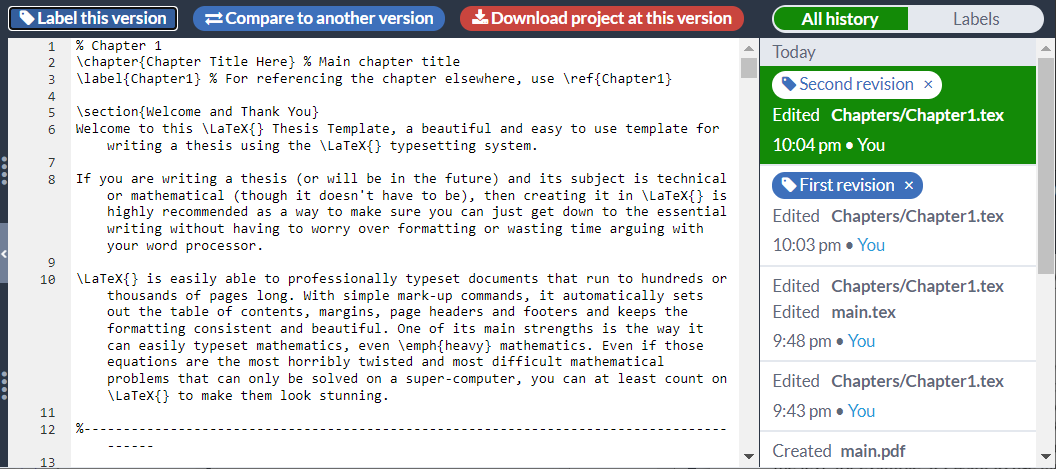
Click a version on the right to switch to it.
Without looking at too many screenshots, this is what you can do if you click on the Menu button in the top-left corner:
- Let Overleaf count the words in your document, excluding code syntax such as commands and environments
- Synchronize with Dropbox or GitHub
- Choose the compiler (pdfLaTeX, classic LaTeX, XeLaTeX, LuaTeX, for advanced users)
- Set a TeX Live version if you want to compile an old file with an old TeX Live version or switch to a newer one
- Select a main .tex document if your project consists of several documents
- Choose a visual style editor theme for the code markup and background, changing colors between light, pastel, dark, and others
- Choose the editor font (such as Consolas or Lucida) and the font size
- (De)activate spell checking, auto-completion, auto-closing of brackets, and code-checking
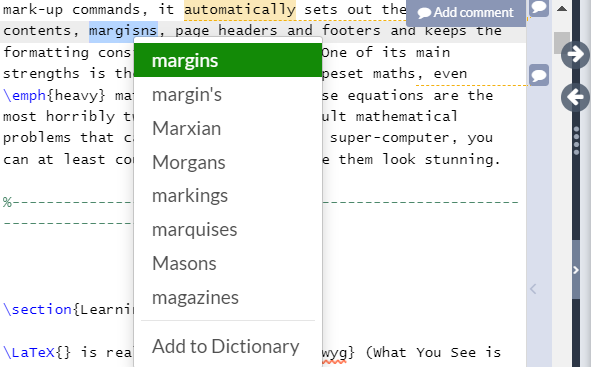
The integrated spell checker of Overleaf marks issues with a wavy line. Just right-click on it to get replacement suggestions, as shown in the following screenshot:
Apropos spellchecking, there’s more.
Grammar and language feedback with Writefull
The Writefull Overleaf extension checks grammar and provides phrasing suggestions for your text. It’s designed for scientific writing, and it’s trained on millions of research journal articles. It can correct typos, grammar mistakes, vocabulary issues, punctuation, and more.
Let’s see it in action on our previous thesis template example:
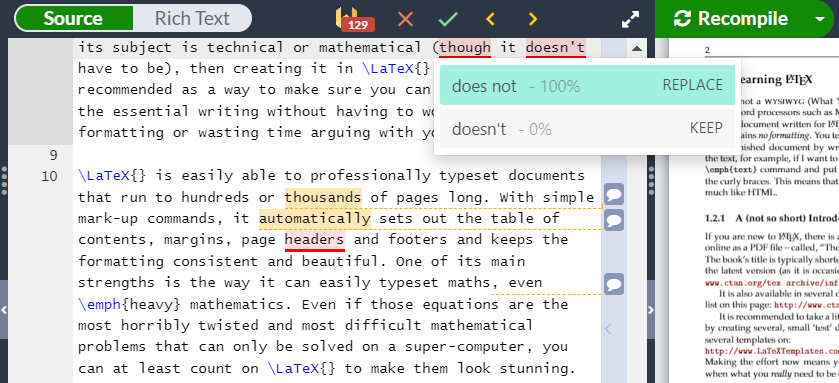
While the spellchecker doesn’t complain, the trained AI of the Writefull extension shows 129 potential issues and gives suggestions to the words underlined in red:
- Though may be replaced by although.
- Doesn’t may be replaced by does not, in formal writing.
After headers (in the previous image), there should be an Oxford comma, that is, a comma before the word “and” at the end of a list.
You can take it easy as I do in this book, not so formal, but your thesis or research articles and any scientific writing may benefit from these suggestions.
The Writefull extension was available for the Chrome browser at first. It was announced that other web browsers, such as Firefox, will be supported in the future. It’s free in a basic version, and there is a premium version that you can read about on their website.
Reviewing and commenting
You probably noticed the text highlighted in yellow and the speech bubble symbols in the previous screenshot. When you click the Review button, the review bar expands and the comments will be shown:
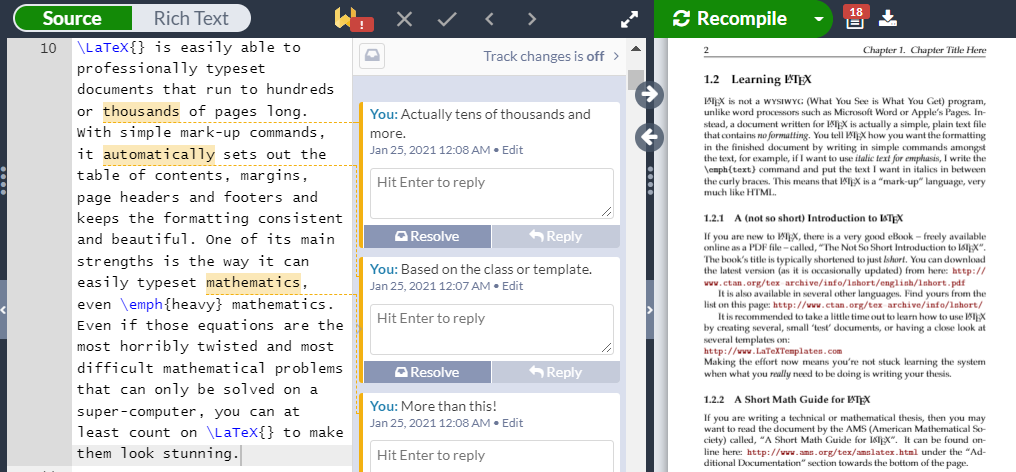
You can mark text snippets, click on Add comment, write what you think, and also reply to other people’s comments. That helps both in your own writing and in collaborating with colleagues or an editor.
This and the previously mentioned features should provide a good insight into current cloud LaTeX services.
Using Overleaf with our book examples
The complete set of the LaTeX Beginner’s Guide code examples can be opened in Overleaf simultaneously, with a single click. Visit latexguide.org/code to get the entire package and have your own project with all book examples included, ready to edit and compile.
The remaining part of Chapter 1 will provide you with a way to access additional supporting documentation and references while working with this book.